
Rain gauges are some of the most basic yet necessary tools used to measure weather today. It was created in 1441 for agricultural purposes. Centuries later, the rain gauge is still widely used to measure climate, weather patterns and monitoring hazards such as floods and droughts.
What You Need To Know
- Our latest Project Weather School looks at rain gauges
- This story looks at their history and their importance to forecasting
- BELOW: What you need for this project + watch Nick's video
- BELOW: Take the 5-question quiz on rain gauges!
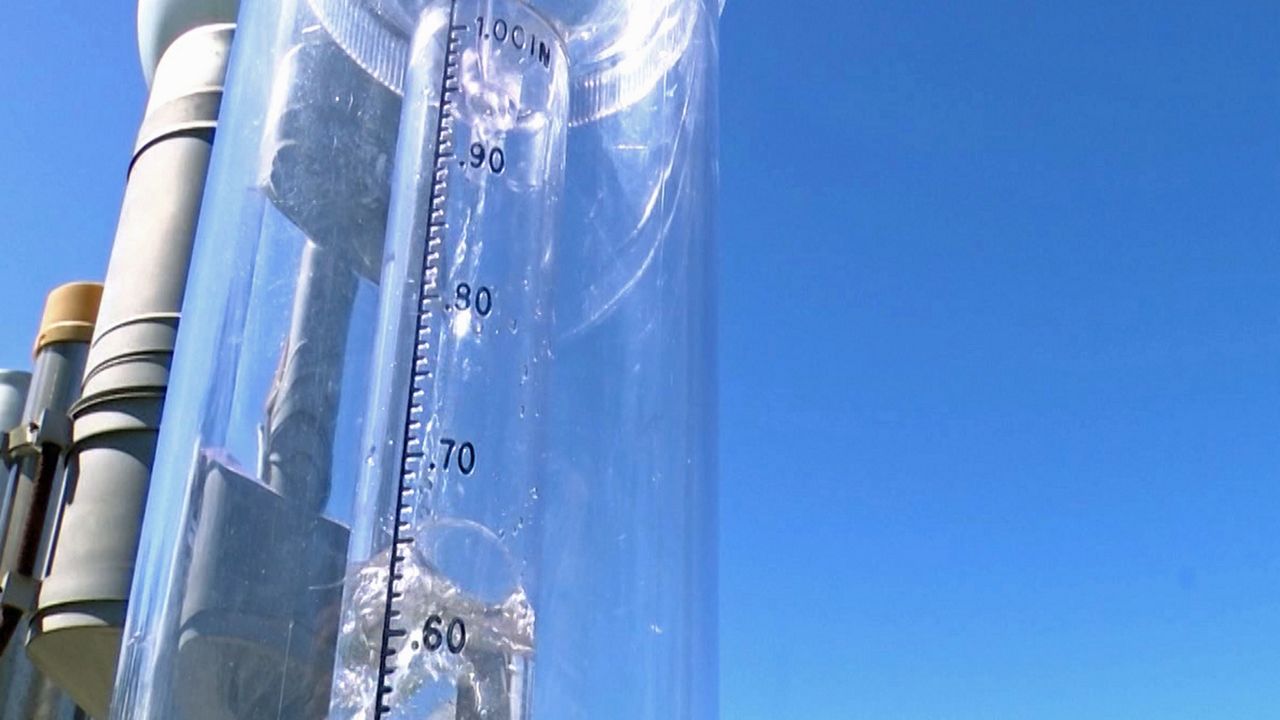
The original design of the rain gauge hasn’t changed much over the last few hundred years. It consist of a cylindrical cup with a funnel-like system collecting and capturing rain water. It’s a very simple design dating back to 1441 and it’s effective, which is why the design hasn’t changed much over time.
The rain gauge works by capturing and collecting rain water into the funnel. The funnel empties the rain water into the cylindrical cup below. The shape of the funnel also helps keep out unwanted debris such as leaves. The water sitting in the cylindrical cup is accumulated rainfall total.
After the storm has passed, an observer can see exactly how much rain fell. A collection of observations from several rain gauges spread across an area can help a meteorologist see what areas had the heaviest rain. The data can also be used to monitor droughts.
Monitoring droughts is one of the most important uses for rain gauges worldwide, especially when it comes to agriculture. For example, farmers rely on rain to water their crops. If the rain gauge shows very little or no rain for weeks or months, the crops risk dying. The opposite is true when the rain gauge shows a lot of rain over a period of weeks or months. It can give a farmer a heads of that a flood may be coming.
Data from rain gauges also help meteorologist prepare for other weather-related disasters such as floods. Remember, rain gauges are located all over the county. If nearby rain gauges start reporting significant rainfall totals, it could be a hint that heavy rain is on the way. Meteorologist use this information to warn the public of hazardous weather.
Advanced technology such as radars and satellites allow meteorologists to see rainfall events in real time. However, the measurements estimated by radars and satellites may not be entirely accurate. Rain gauges provide an exact measure and ground confirmation of specific weather events.
Now that you know why rain gauges are super important, it’s time for you to play a role as a scientist. Let’s do an experiment by creating our own rain gauge. From there, you can keep daily measurements of rain in your backyard. You can always send your rainfall total from your town to our meteorologist at Spectrum Bay News 9!
Experiment: Creating a Rain Gauge
Purpose: Build an instrument that can be used to track how much rain falls each day.
What you need:
- A clear plastic bottle
- Scissors
- A sheet of paper
- Marker
- Ruler
- Modeling Clay
- Duct Tape
Procedure:
1. The plastic bottle will be used as the rain gauge and it needs to be cut open with the scissors. Using the sheet of paper, wrap it around the bottle covering nearly 75% of the bottle, keeping the top exposed.
2. Use the marker and draw a line on the bottle using the edge of the paper as a guide. This is going to be where you cut the bottle with the scissors.
3. Using the scissors, cut along the line until the bottle is cut in half.
4. Place the top half of the bottle aside. You will need this shortly.
5. Next we need to create a flat surface at the bottom of the bottle. This can be done by using the modeling clay. Place it in the bottle and use the back of a marker to beat it down, making the surface smooth and pushing out as many air pockets as possible. This gives us a smooth surface allowing for a more accurate rainfall reading. The clay will help keep the rain gauge from tipping over in the wind.
6. Tape a piece of the duct tape to the side of the bottle. Be sure to match the edge of the duct tape with the top surface layer of the clay.
7. Now we have to turn the duct tape into a homemade ruler. To do this, you will align a ruler with the duct tape and mark the duct tape in half inch intervals. Be sure to label the markings (I.E. 0.50”, 1.00”, 1.50” and so on.
8. Take the top piece of the bottle and place it upside down inside the rain gauge. This will act to funnel the rain into the cylindrical cup.
9. Place the rain gauge outside, preferably away from trees and away from the house. Ideally, you want the gauge to be clear from obstructions.
10. Record your results daily and after each rain storm. Feel free to make a bar graph, line graph, etc as the days go on. With time, you will learn which months in our area tend to be wet and which months tend to be dry.
Results: A functioning rain gauge to measure rain each day at home.
Conclusion: The rain gauge is a simple yet effective way of measuring how much rain falls in one spot. These results can be graphed and analyzed to see trends on a week to week, month to month and year to year basis.